URY Setup
This guide takes you step-by-step through setting up URY on top of ERPNext
Step 1 : Company
- Login into the site and Follow the installation wizard
- Specify the language.
- Provide country , timezone and currency details.
- Create the first user.
- Enter company name, its description, and select a bank account.
- click on 'Complete setup'
Step 2 : Users and Roles
-
To manage restaurant operations in URY, you’ll need to set up specific user roles in the ERPNext/Frappe system. Use the Frappe/ERPNext interface to create a new user.
-
Assign one of the three URY roles to users:
- URY Manager - Responsible for overseeing and managing all restaurant operations.
- URY Captain - Responsible for managing customer orders and table service.
- URY Cashier - Responsible for managing customer orders, table service, and handling payments and POS operations.
-
Below are the recommended DocType permissions for URY roles. These permissions cover only the basic restaurant operations needed for URY (such as table service, billing, and order handling). You can extend or modify them later based on your restaurant’s workflow and access needs.
View Role Permissions
Role Doctype Perm Select Read Write Create Delete Submit Cancel Amend Print Email Report Import Export Share URY Captian Company 0 ✓ ✓ - - - - - - - - - - - - Currency 0 ✓ ✓ - - - - - - - - - - - - Customer 0 ✓ ✓ ✓ ✓ - - - - - - - - - - Item Price 0 ✓ ✓ - - - - - - - - - - - - POS Invoice 0 ✓ ✓ ✓ ✓ - - - - ✓ - - - - - POS Opening 0 ✓ ✓ - - - - - - - - - - - - URY KOT 0 ✓ ✓ ✓ ✓ - ✓ ✓ - - - - - - - URY KOT Error Log 0 ✓ ✓ ✓ ✓ - - - - - - - - - - URY Cashier Company 0 ✓ ✓ - - - - - - - - - - - - Currency 0 ✓ ✓ - - - - - - - - - - - - Customer 0 ✓ ✓ ✓ ✓ - - - - - - - - - - Item Price 0 ✓ ✓ - - - - - - - - - - - - POS Profile 0 ✓ ✓ - - - - - - - - - - - - POS Invoice 0 ✓ ✓ ✓ ✓ - ✓ ✓ - - - - - - - POS Opening 0 ✓ ✓ ✓ ✓ - ✓ - - - - - - - - POS Closing 0 ✓ ✓ ✓ ✓ - ✓ - - - - - - - - Sales Invoice 0 ✓ ✓ ✓ ✓ - ✓ - - - - - - - - User 0 ✓ ✓ - - - - - - - - - - - - User 1 - ✓ ✓ - - - - - - - - - - - URY KOT 0 ✓ ✓ ✓ ✓ - ✓ ✓ - - - - - - - URY KOT Error Log 0 ✓ ✓ ✓ ✓ - - - - - - - - - -
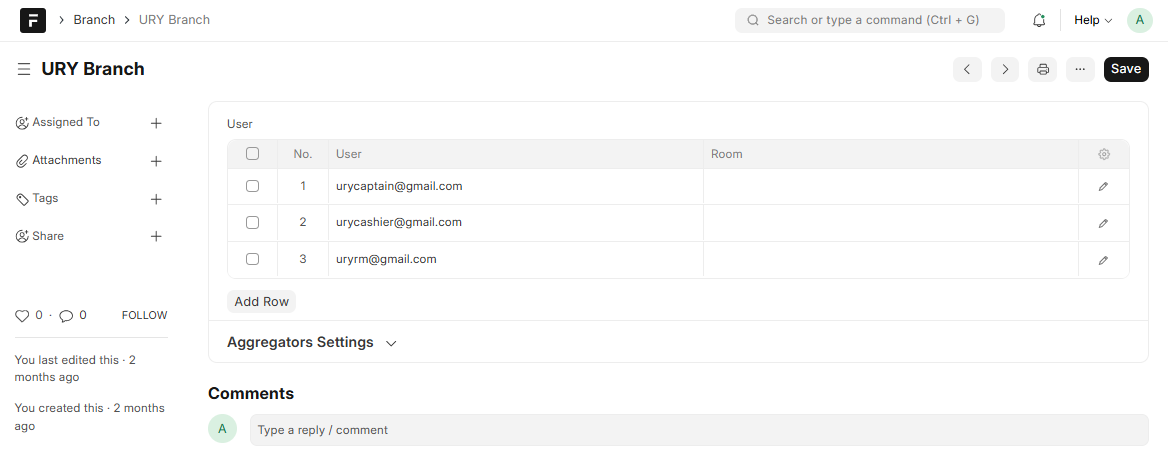
Step 3 : Branch
-
Create Branch in ERPNext.
Branch setup manage users, POS access, and aggregator configurations for delivery platforms, ensuring smooth operations.
-
Specify branch users in the table; note that only these users can access the POS of that branch.
- Aggregator Settings : If your restaurant uses aggregator platforms (such as food delivery services), configure the following details:
- Customer : Create or link the customer profile for aggregator orders.
- Price List : Create a Selling type price list for the aggregator and ensure that item prices are added to this list so they appear correctly in the menu.
- Mode of Payment : Set up a mode of payment for aggregator transactions.
- Keep Sales Invoice Unpaid : Check this box if you want the aggregator's sales invoice to remain unpaid.
- Create Invoice without Tax : Check this box if you want the aggregator's invoice to be created without tax. This applies to both Sales Invoice and POS Invoice.
- Aggregator Settings : If your restaurant uses aggregator platforms (such as food delivery services), configure the following details:
Step 4 : URY Restaurant
-
Go to the "URY Restaurant List" and create a new restaurant with the following details:
The restaurant setup links your company, branch, and menu together, defining details like tax templates, invoice series, and menu configurations for rooms and order types.
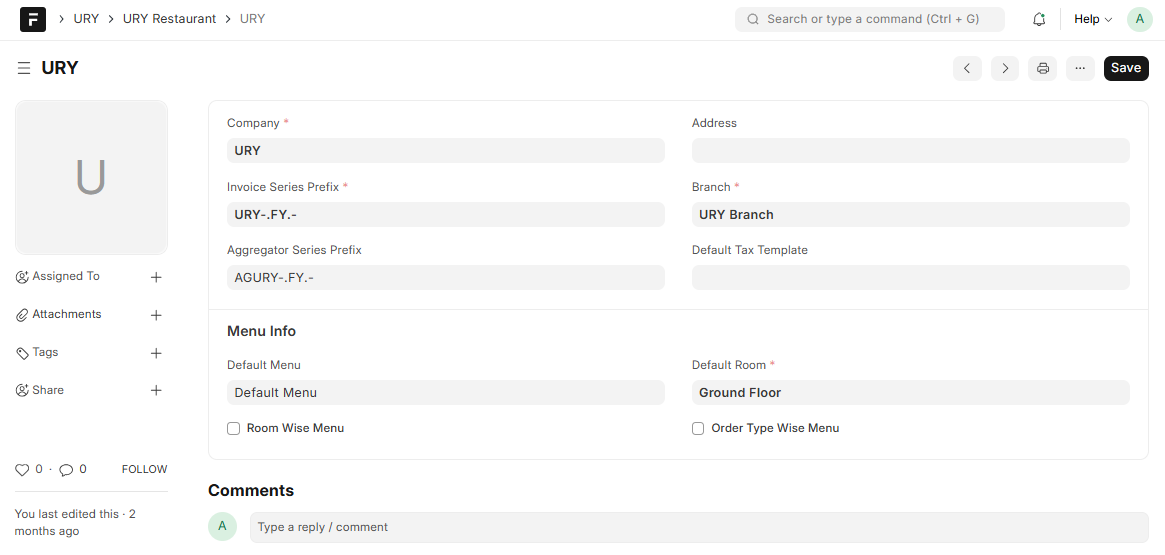
- Name : Restaurant name
- Company: Specify the company under which the restaurant is being created.
- Invoice Series Prefix: allows you to define prefix for naming of an Invoice .
- Aggregator Series Prefix: allows you to define prefix for naming of a aggregator Invoice.
- Branch : Select the branch associated with the restaurant .
- Default Tax Template : Mention the Sales tax value if applicable.
- Address : Provide the address of the restaurant.
- Default Menu : Select Menu against the restaurant.
- Room Wise Menu : To enable room wise menu.
- Menu For Room : Add restaurant menu against each room to handle room wise price list.
- Order Type Wise Menu : To enable order type wise menu for cashier.
- Menu For Order Type : Add restaurant menu against each order type to handle order type wise price list.
Step 5 : URY Room
-
Next is to Create Restaurant Room with the following details :
Rooms help organize your restaurant layout—such as indoor, outdoor, or VIP areas and define where orders and print actions (like bills or KOTs) are directed. Each room can have its own printer setup to manage room-wise printing. Make sure to add the room to the corresponding URY Restaurant.
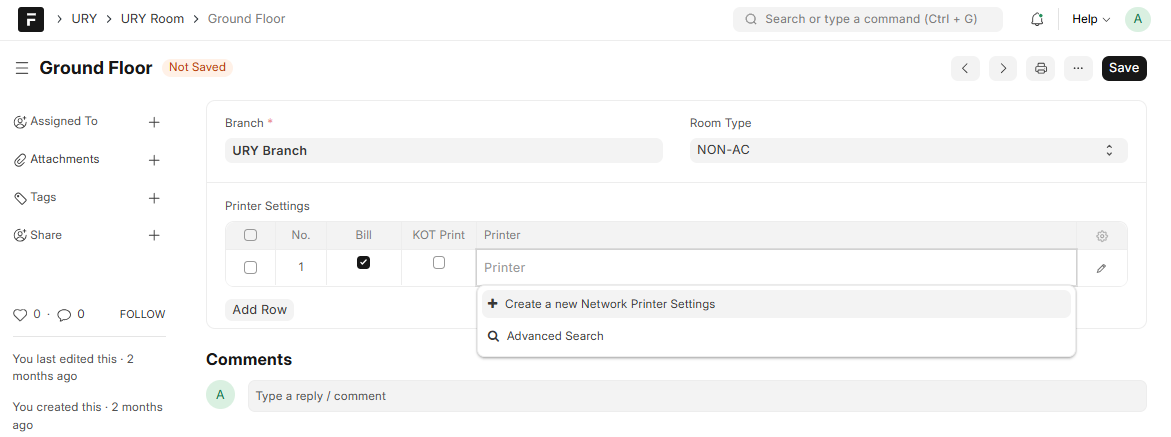
- Name : Specify a unique name to the room.
- Room Type : Select the type from the list.
- Print Settings : Choose a network printer.
- Bill : Enable for Invoice Printing .
- KOT Print : Enable for KOT Printing .
Step 6 : Item
- Create Item to be included in the URY Menu.
- If an item is sold in a bundle, consider using the Product Bundle feature.
Step 7 : URY Menu
-
Create Restaurant Menu From "URY Menu List" with the following details:
Menu define the list of items available for order, their prices, and how they’re displayed in the POS.
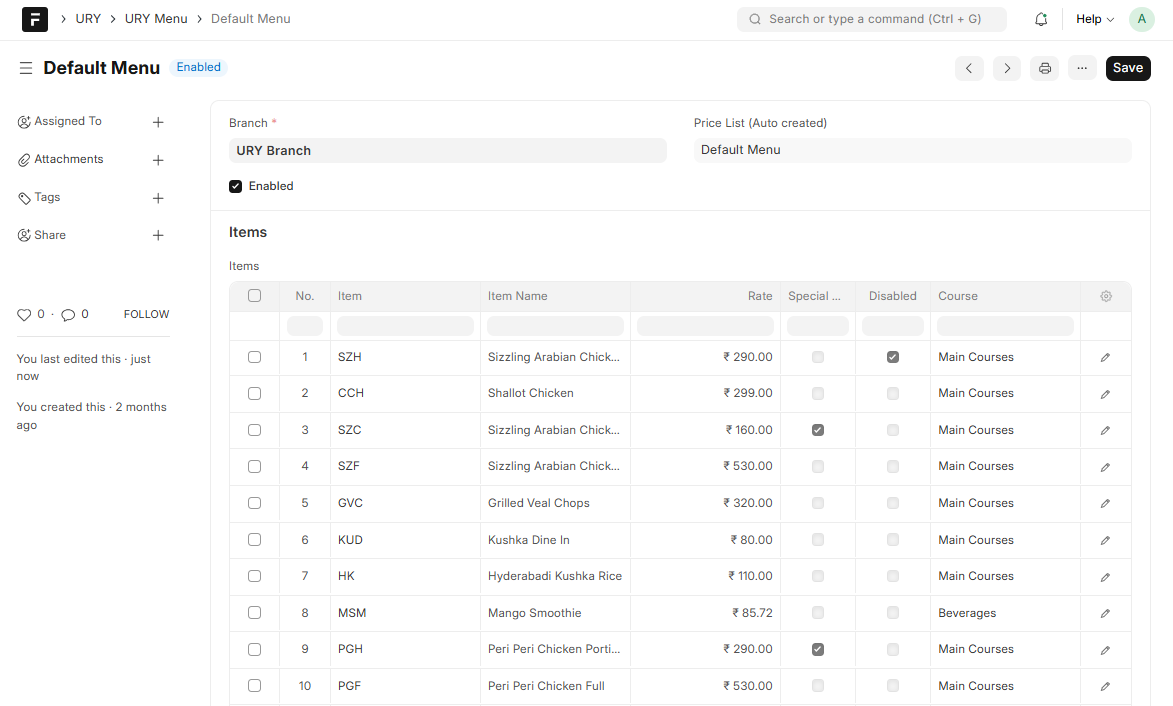
- Name : Specify a unique name to the menu .
- Restaurant : Linked to URY Restaurant to select restaurant .
- Branch : This field will be automatically populated when you select a restaurant.
- Enabled : Activate the checkbox to enable the menu.
- Items : List the items included in the menu and their respective rates.
- Special Dish : You can use this checkbox in the Item table to show an item as a
Special ItemsorPriorityitem for menu display. - Disabled : You can use this checkbox to remove item from menu as per need.
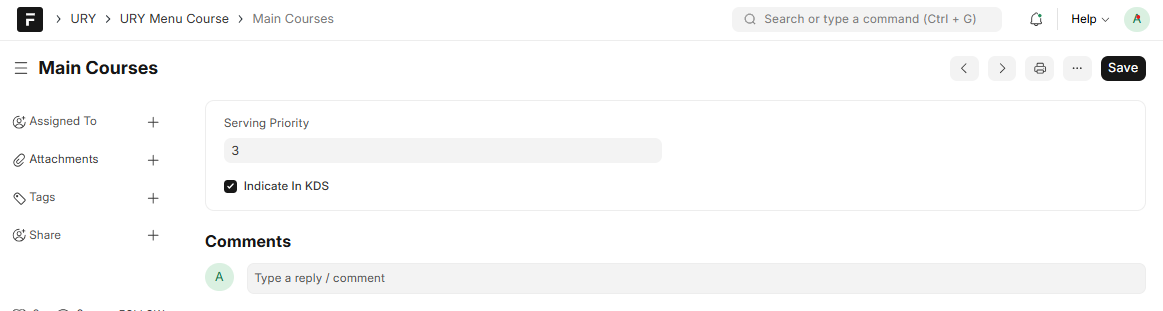
- Course : Categorize each item based on the course type (e.g., Starters, Mains, Desserts). In POS, the menu can be categorized and viewed by Course. If the Indicate in KDS checkbox is enabled for a course, the Kitchen Display System (KDS) will use the serving priority to determine the preparation and serving order of items.
Example:
Step 8 : URY Table
-
Create tables for the restaurant in the "URY Table List" with the following details:
Tables define the seating layout, their availability and are visually displayed on the POS for easy selection.
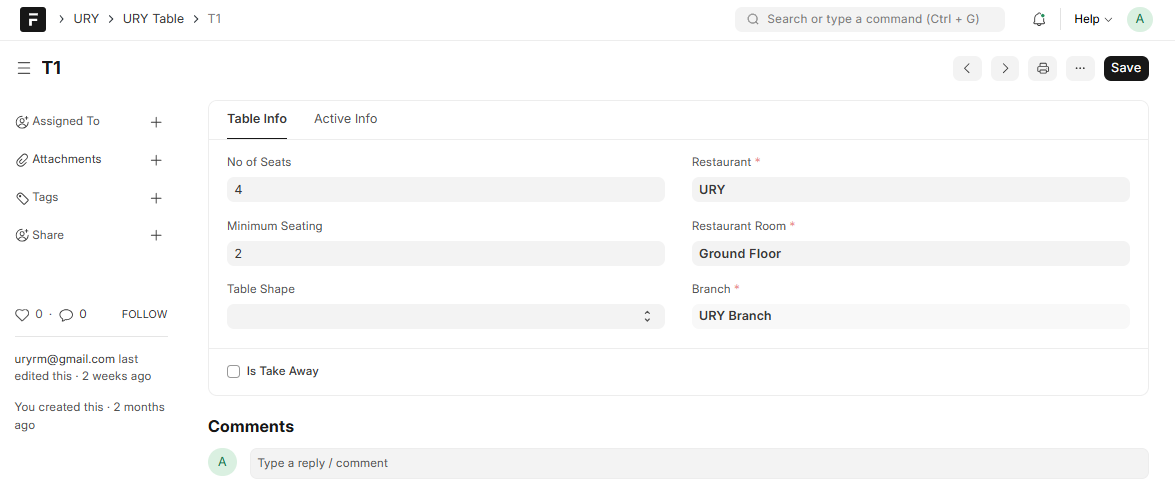
- Name : Specify the table name that will be listed in URY Order.
- Restaurant : Select the associated restaurant.
- Restaurant Room : Specify a room to which the table belong ( if no room in restaurant , create a default room and select it for all)
- Branch : This field will be auto-populated when the restaurant is selected.
- No of seat : Input the number of seats at the table.
- Minimum seating : Specify minimum seating capacity .
- Is Take Away : For take away orders ( Order type will be "Take Away") .
- Active info : Record table status and time . Both are read-only .
- Table Shape : Use this option to add the table shape for display on the POS screen.
Step 9 : POS Profile
-
Create POS Profile in ERPNext with the following additional fields:
-
Printer Info
- Configure printing options for invoices and KOTs. For network printers, select the printer in the printer settings table. For QZ printing, enable QZ Print and enter the host IP.
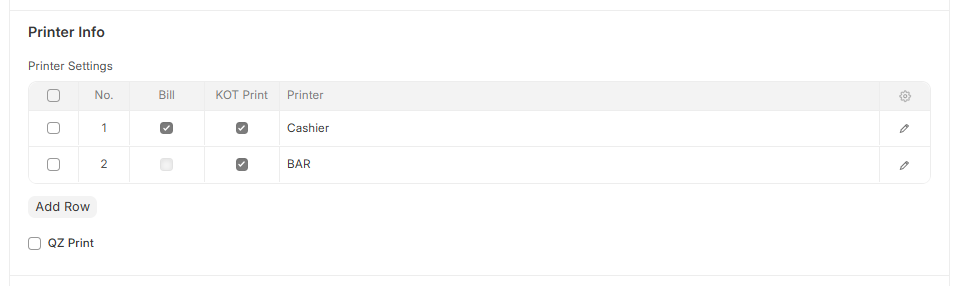
- Printer Settings : Select a printer, enable Bill for invoice printing and KOT Print for KOT printing. For multiple rooms with separate printers, configure the printer settings in the corresponding URY Room for room-wise printing.

- QZ Print : Check this box to enable QZ printing.
- QZ Host : Enter the Network IP for QZ printing.
-
URY POS Restrictions
- Set role-based permissions, cashier access, table order restrictions, and operational settings such as attention time, discount, daily POS closing, and visibility of paid invoices.
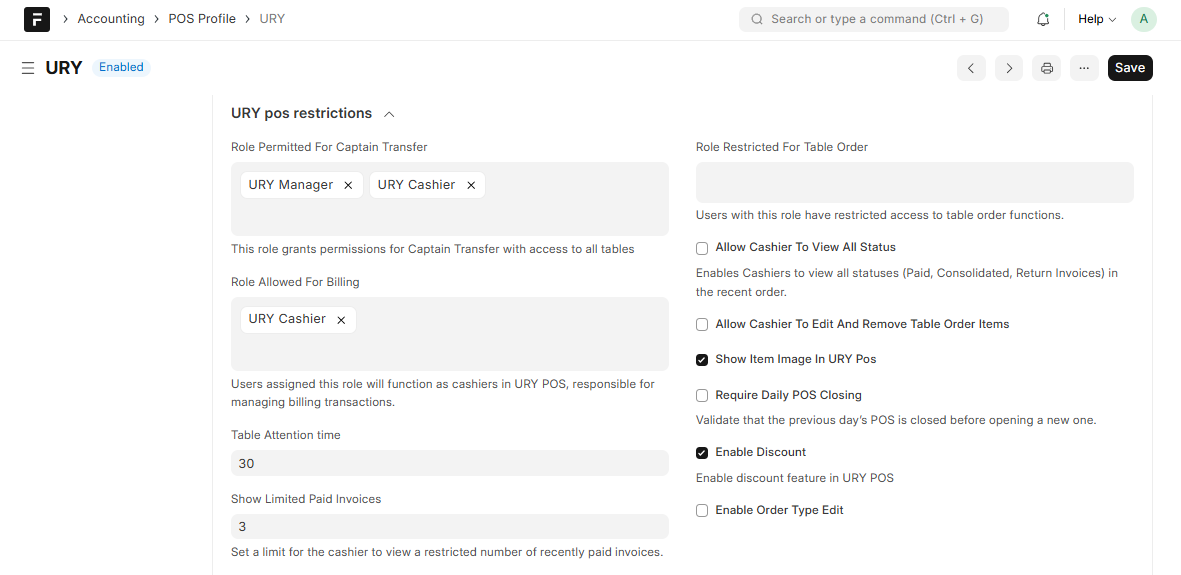
- Captain Transfer Role Permissions : Roles added to this field will have permission for 'Captain Transfer'. Users with this role will also have access to all tables.
- Role Allowed For Billing : Users assigned this role will function as cashiers in URY POS, responsible for managing billing transactions.
- Role Restricted For Table Order : Users with this role have restricted access to table order functions.
- Table Attention Time : To indicate "Attention" status in the table of URY POS.
- Show Limited Paid Invoices : Set a limit for the cashier to view a restricted number of recently paid invoices.
- Allow Cashier To View All Status : Enables Cashiers to view all statuses (Paid, Consolidated, Return Invoices) in the recent order.
- Allow Cashier To Edit And Remove Table Order Items : To permit cashier to edit and remove table orders.
- Show Item Image In URY POS : To show image in URY POS.
- Require Daily POS Closing : Validate that the previous day’s POS is closed before opening a new one.
- Enable Discount : Enable discount feature in URY POS.
- Enable Order Type Edit : Use this option to change the order type of an existing invoice.
-
Multiple Cashier Configuration
- Enable Multiple Cashier : Enable this checkbox if the outlet has multiple cashiers. Then, add the cashiers under 'Applicable for Users' and enable the 'Main Cashier' checkbox for the head cashier.
-
KOT Settings
- Configure how Kitchen Order Tickets (KOTs) are managed and monitored, including naming series, timers, reprint and audio alert options, delay notifications with recipients, and daily order number resets to streamline kitchen operations.
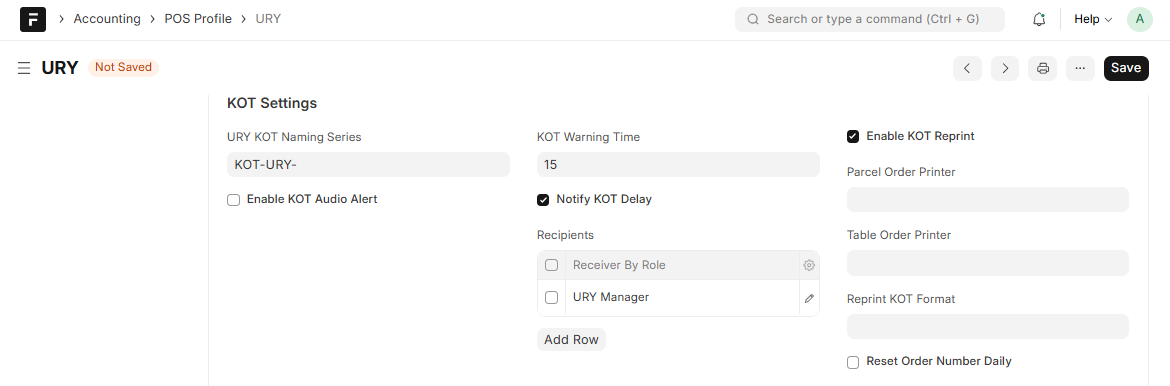
- URY KOT Naming Series : Add a naming series for KOT. A KOT will be created only if a naming series is set.
- KOT Warning Time : Timer against KOT are set in this field to trigger a warning when it's exceeded in KDS.
- Enable KOT Reprint : Use this option if you need the reprint feature for KOT prints. Make sure to add the appropriate printers and print format.
- Enable KOT Audio Alert : Can enable to play a sound when a KOT is displayed. You can add an audio alert in the
KOT alert soundattachment field. - Notify KOT Delay : Can enable for KOT delay notification and add recipient roles to the Recipients table.
- Recipients (By Role) : Add roles of users to receive KOT delay notifications.
- Reset Order Number Daily : Use this option to reset the order number for POS Invoices on a daily basis. Note that this is not the invoice number.
Note: Update the Price List in Accounting to restaurant menu price list.
Step 10: URY Production Unit
-
URY Production Unit Create Production Unit From "URY Production Unit" with the following details:
Production Units manage multiple kitchens, each with its own web-based interface for displaying KOTs in the Kitchen Display System (KDS). Printers can also be configured per unit for physical KOTs if needed.
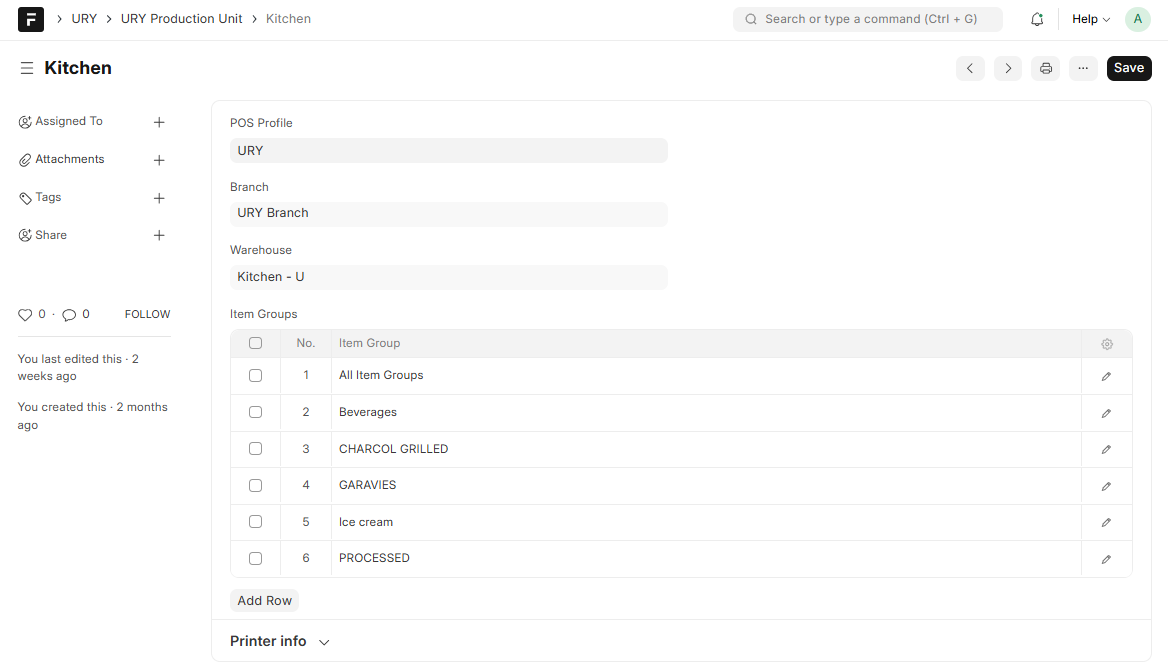
- Production : Enter the name for your Production Unit.
- POS Profile : Select the POS Profile
- Branch : Auto fetch when pos profile is selected
- Warehouse :Auto fetch when pos profile is selected.
- Item Groups :Select Item Groups that belong to the production unit.
- Printers : Table to configure printing inside production unit.
- Printer : Select Network printer.
- KOT Print : Enable for KOT Printing .
- KOT Print Format : Select print format for KOT .
- Block Takeaway KOT : Enable for block Takeaway KOT printing .
Note: To access KDS follow the site url with
/URYMosaic/Production%20Unit%20Name. eg: https://ury.xxxx.com/URYMosaic/Kitchen
Step 11 : User Permissions
- User Permissions control access to specific records in ERPNext. Give User Permission to the user for the documents they need to access, such as:
- POS Profile
- Branch
Step 12 : Printer Setup
- QZ Printer
- Add your certificate file is at
ury/public/files/cert.pem. - Update the
pos/privateKey.jsfor v2 andurypos/privateKey.jsfor v1.
- Add your certificate file is at
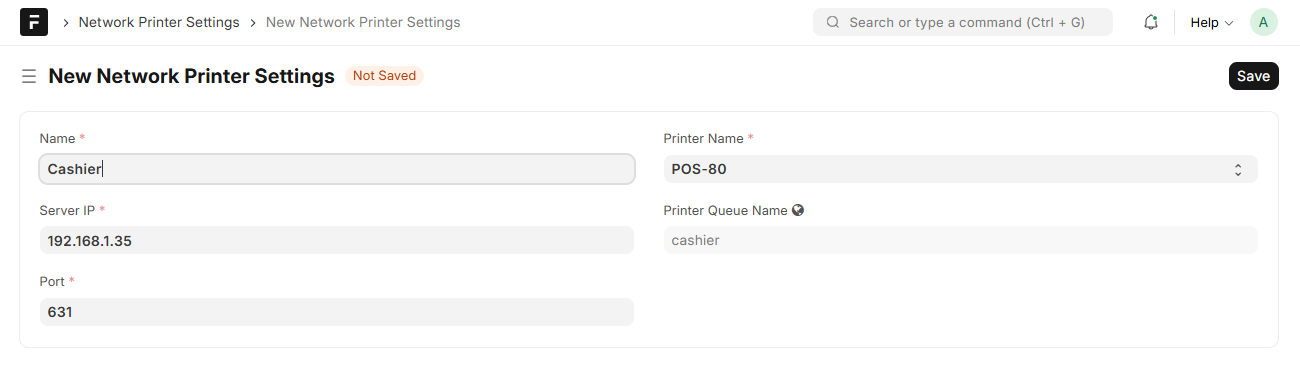
- Network Printer
- Set up CUPS (Common Unix Printing System) for network printing.
- In Network Printer Settings, add your printers and note their and enter the corresponding printer in the URY Room for invoice printing from POS.
Step 13 : Customer Search
- frappe.utils.global_search is used for customer searching ,you have to run the following commands for building search index
bench --site site-name build-search-index
and
bench --site site-name rebuild-global-search
Step 14: Multiple Cashier Configuration
- Follow the steps below to set up and manage multiple cashier operations in URY, allowing multiple cashiers to handle billing under one POS profile with individual transaction control.
- Create Cashier User : Create user with the URY Cashier role.
- Assign Rooms : Assign URY Rooms to users. Users can only access POS for the rooms they are assigned to.
- Configure POS Profile :
- In the Applicable for Users table of the POS Profile, add all cashiers for the POS and enable Main Cashier for the head cashier.
- Enable Multiple Cashier in the Multiple Cashier Configuration.
- Workflow
-
POS Opening
- The main cashier creates the POS Opening Entry first, followed by sub cashier. The main cashier must always open the POS first.
-
Order Processing
- Proceed with normal order taking and restaurant operations.
-
Sub POS Closing
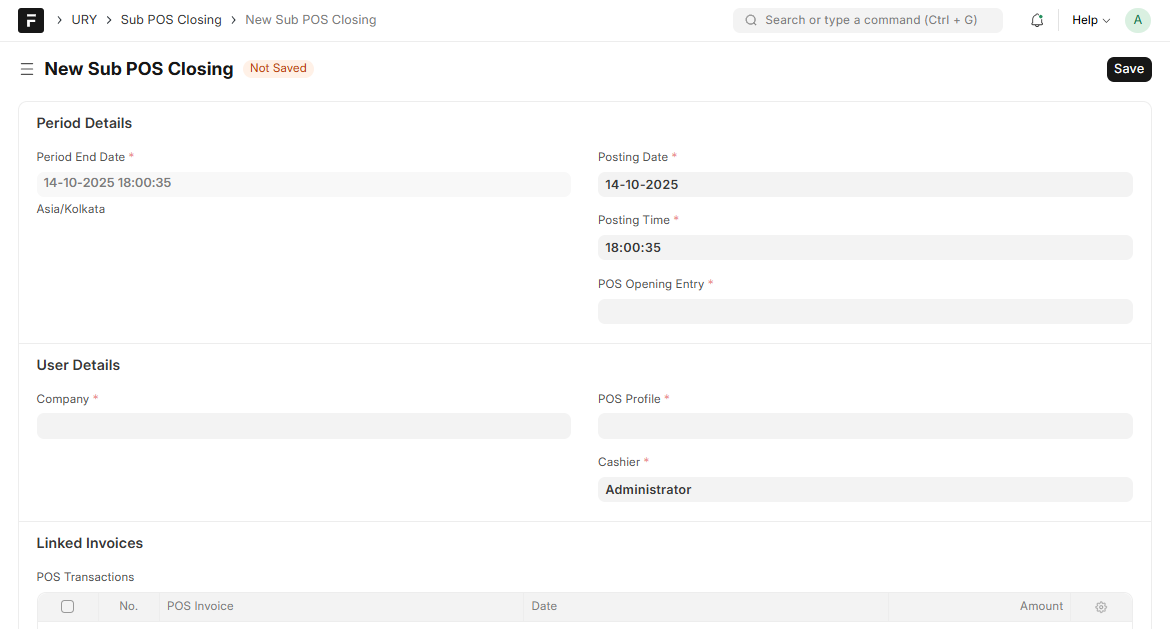
- Sub cashier creates a Sub POS Closing Entry.
- Sub POS Closing Entry is an URY Doctype to reconcile sub cashier transactions separately.
-
POS Closing
- Main cashier creates a POS Closing Entry
-
Step 15: URY Report Setting
-
Navigate to URY Report Settings in your site.
-
Click on Add URY Report Settings.
-
Under the Details tab:
- Extended Hours : Enable this if the branch operates after 12 AM.
- No of Hours : Enter the number of hours, if extended hours is enabled.
-
Under the Daily P and L Settings tab:
- Buying price List : Select the buying price list for your branch.
- Under Direct Expenses:
- Burning Materials (Other Consumables) : Table to list consumables.
- Material : Enter the Material (e.g., gas, charcoal).
- Cost Per Unit : Specify the cost per unit for each material.
- Direct Fixed Expenses : Table to add list of daily fixed direct expenses.
- Expense : Provide the expense name.
- Amount : Specify amount for each expense.
- Burning Materials (Other Consumables) : Table to list consumables.
- Under Indirect Expenses:
- Electricity Charges: Enter the electricity charges per unit.
- Indirect Fixed Expenses : Table to list daily fixed indirect expenses.
- Expense : Provide the expense name.
- Amount : Specify amount for each expense.
- Percentage Expenses : Table to list of expenses as a percentage of sales.
- Expense : Provide the expense name.
- Percentage Type : Choose the percentage type (Net Sales or Gross Sales).
- Percent : Specify the percentage of the selected type.
- Under Employee Costs:
- Employee Costs : Table to list daily fixed expenses as a part of employee costs.
- Expense : Provide the expense name.
- Amount : Specify amount for each expense.
- Employee Costs : Table to list daily fixed expenses as a part of employee costs.
- Under Direct Expenses:
- Depreciation : Add depreciation amount if applicable.
- Buying price List : Select the buying price list for your branch.
-
Daily Gross Salary Cost is calculated from employees attendance.
- Follow these steps to set up the payment type and payment amount for employees:
Step 1:
- Navigate to Employee in your site.
- Choose the relevant Employee.
Step 2:
- Under the Salary tab:
- Payment Type : Choose between Salary or Daily Wage.
- Payment Amount : Enter the corresponding payment amount.
Follow the Attendance documentation for marking the attendance or use the Employee Attendance Tool